Up until the age of eleven I took a packed lunch to school every day. My primary school was pretty small and didn’t have a kitchen to cook up school dinners on a daily basis. While it sometimes seemed a shame that we didn’t get to eat anything hot at lunchtime, given that this was well before Jamie Oliver waved his magic wand over what we’re allowed to serve to kids in this country, it was probably quite a good thing.
I’ve talked before on this blog about how important healthy food was to my Mum when we were growing up. This is the woman who would offer little packets of Sunmaid raisins to trick-or-treaters come Halloween while the other mums were doling out chocolate and sweets, so you can imagine the contents of my packed lunch were always pretty virtuous.
Once, to my complete mortification, my Mum included carrots with their leafy tops still intact. I think half the lunch room was stunned into silence having never seen a carrot complete with its greenery and not in a packet before, but the rest of my friends found it absolutely hilarious and choruses of Bugs Bunny’s ‘What’s Up Doc?’ followed me around for at least a week after the incident.
I obviously wasn’t completely traumatized by this experience as I still enjoy eating carrots as a snack well into my twenties. Another thing that was often included in my school packed lunch and that I still eat on a regular basis is wholemeal pitta bread. Having been brought up on brown bread from an early age, I’ll almost always opt for the nutty, more toothsome texture of wholegrain loaves and rolls over white (although, actually, I’m also easily tempted by a salty focaccia or crusty French baguette), and I’m always looking for new ways to incorporate whole grains into my daily baking.
Surprisingly, for someone who eats quite a lot of the things, I’ve never made my own pitta bread. Maybe the technical aspect of creating perfect pockets put me off or, more likely, the fact that you can buy them in just about every corner shop across the UK, but it wasn’t until I received a copy of Paul Hollywood’s How to Bake that I decided it was time to give them a go.
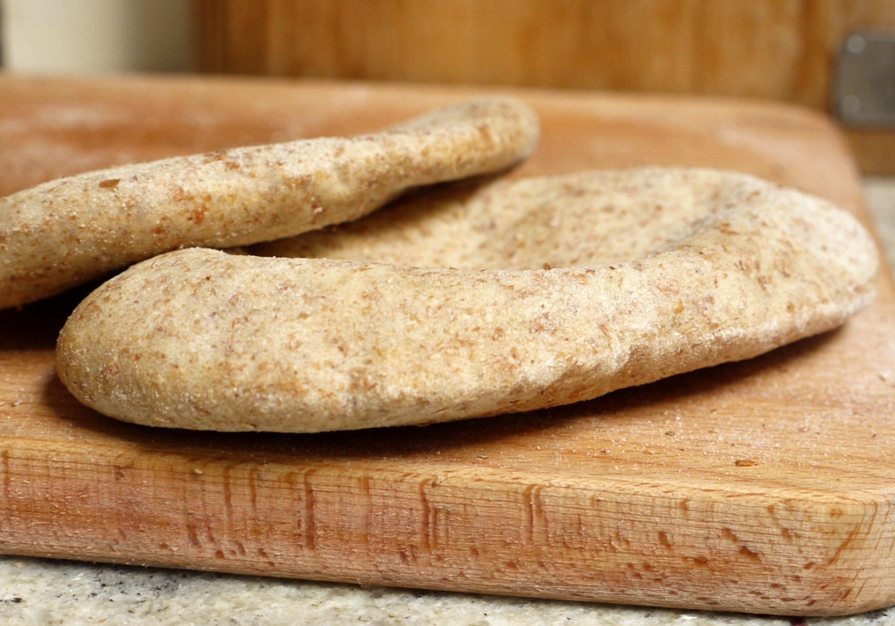
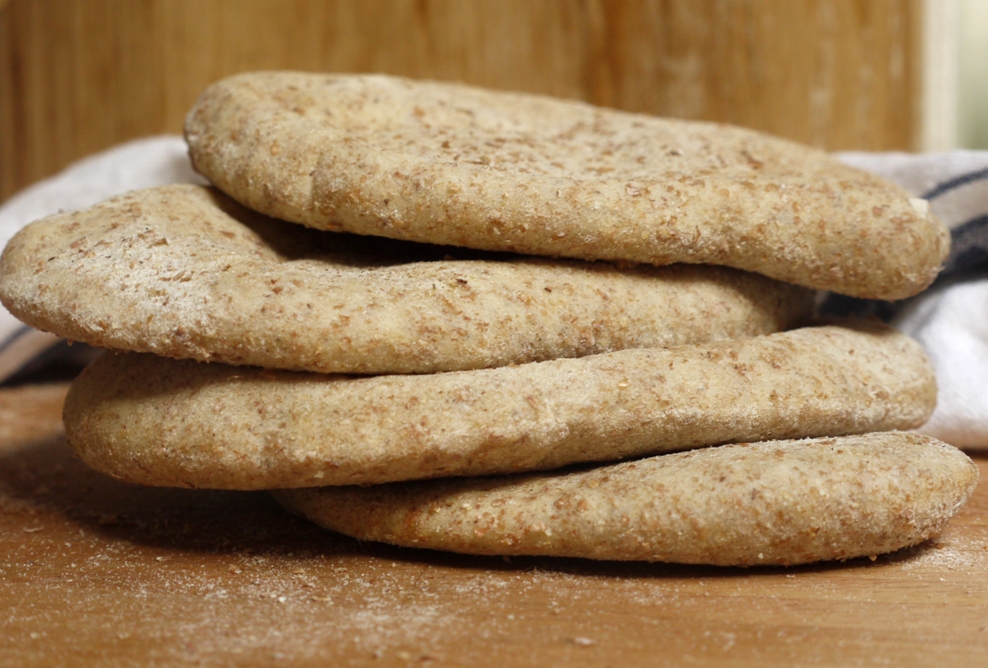
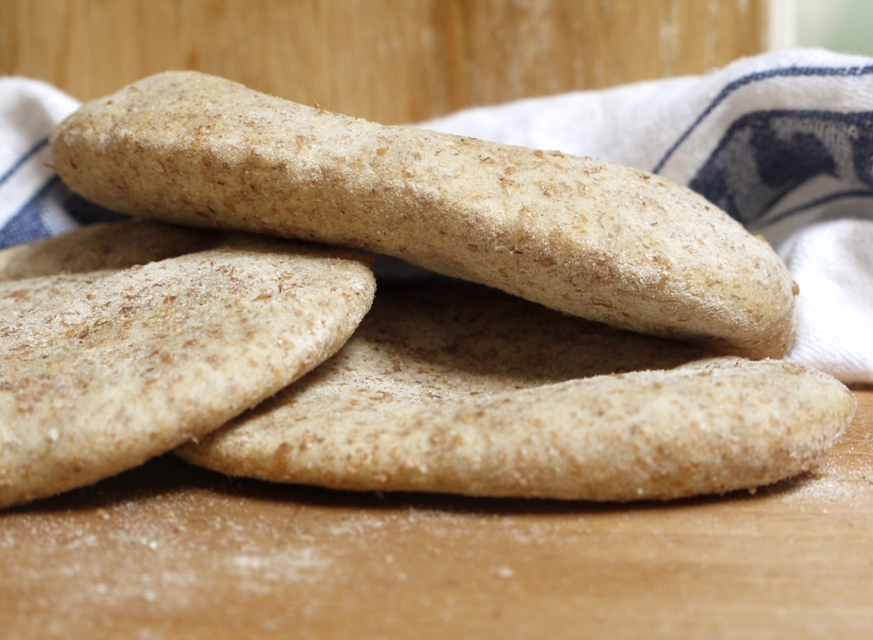
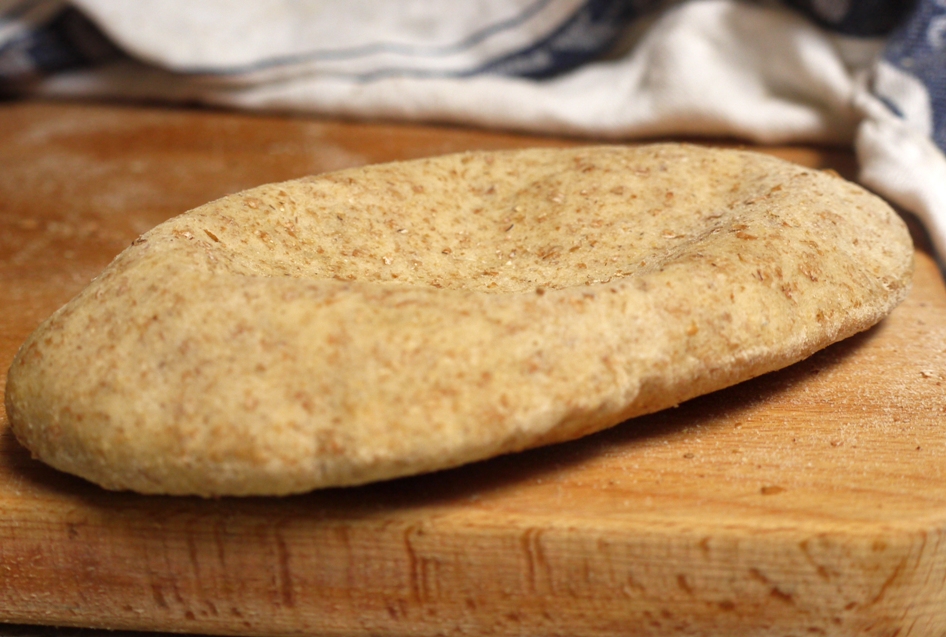
Homemade pitta bread is a revelation (as is any homemade bread really, I’m not sure why it took me so long to realize this about pittas in particular). Compared to the dense, chewy, slightly stodgy bread you get in those sealed plastic packets, these are soft, fluffy pillows of perfection. They’re also insanely easy to make: ten minutes kneading and mixing the dough, an hour to prove, then roll them out, throw them on a baking stone and in around five minutes you have the most amazing freshly baked pitta bread.
Because of my love of all things wholemeal, I’ve adapted Paul’s recipe ever so slightly, converting the 100% plain flour recipe into a 70:30 ratio of wholemeal to white. If you want to make yours as he originally intended you’ll just need to watch the amount of water, erring at the lower end of what is suggested below. But if you’re unsure about baking with wholemeal flour because you think the results will be dense or heavy or dry or any of those other things people associate with the healthy qualities of wholemeal, please give my version a try, I promise you’ll be surprised.
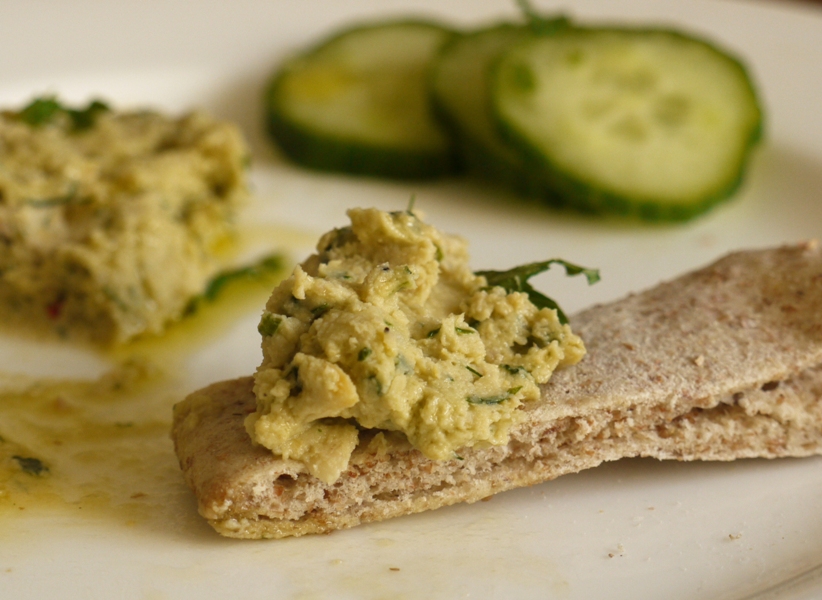
Serve these pittas warm with homemade hummus (as in the photo above). Stuff them full of falafel, spiced lamb kofte charred on the barbecue and just the right side of greasy or, as we did on Monday, with succulent slices of Ottolenghi’s chicken shawarma, grilled courgettes, tahini sauce and a red onion salad. They’re also perfect for packed lunches. Green fronded carrots and a packet of Sunmaid raisins optional.
Wholemeal Pitta Bread (very closely adapted from How to Bake)
(makes 8 medium sized pitta breads)
Ingredients:
175g strong wholemeal bread flour plus extra for dusting
75g strong white bread flour
5g salt
7g instant yeast
140 – 165ml cool water
2 tsp olive oil
Method:
Combine both flours in a large mixing bowl. Add the salt to one side and yeast to the other. Add 140ml of water and the olive oil and turn the mixture round with your fingers, picking up all the flour from the sides of the bowl. You’re aiming for a soft but not soggy dough, so add a little more of the water if necessary. If you’re using all white flour you may not need all the water.
Tip the dough onto your work surface (coating with a little oil if you’re worried about it sticking) and knead for 5 – 10 minutes until the dough starts to form a soft, smooth skin.
When the dough is smooth and silky, shape it into a round a place it in a clean, lightly oiled bowl. Cover with a tea towel and leave to rise for 1 – 2 hours, preferably in a warm place. One hour is probably the minimum amount of time it will take to double in size, but you can leave it anything up to three.
Put a baking stone or tray in the oven and heat it to 220 degrees C.
Dust the work surface with wholemeal flour. Tip your risen dough onto the work surface and gently fold it inwards on itself until all the air is knocked out and the dough is smooth. Divide your dough into eight equal sized pieces and shape each piece into a ball, keeping them covered with a tea towel as you work.
With a rolling pin, roll each piece of dough into an oval approx. 3mm thick, keeping it generously dusted with flour.
Scatter your hot baking stone or tray with flour then lay as many pitta breads as will fit without touching onto it. Bake for 5 – 10 minutes (mine took closer to 5 minutes), removing the pittas from the oven as soon as they show any sign of colour. This will ensure they are beautifully soft.
Allow the pittas to cool under a tea towel – the trapped steam will keep them soft. These pittas are best eaten within 24 hours of making but they also freeze beautifully – you can defrost them in the oven or straight into the toaster.


They look wonderful and perfect, and so much tastier than the white variety.
I have never made this before, either, and it looks really simple. Thanks for posting!
this looks perfectly made. What a nice smell there must have been in your house!
As someone who hasn’t bothered to make pita bread before you just made it look so easy that I am going to have a go. While Brunhilda (our wood burning stove) is still in operation, I am going to bake lots of them for our upcoming summer months to fill with salad etc. and freeze them for when it’s too hot to care. Cheers for a great post 🙂
Great looking pitta – very impressive actually!
What a gorgeous recipe, and they do sound delicious! I love making homemade bread, but I have never made pita bread. Hubby and I are always trying to find new healthy recipes, and simple lunch ideas, this would be perfect! Hugs, Terra
These look beautiful, so glad they puffed. I think a baking stone is one of the things that makes a difference, as it conveys more heat.
They look AMAZING! I’m so impressed. Like you, I often don’t try making things if they are readily available and cheap… but seeing posts like these make me realise I shouldn’t be so quick to pass on these sorts of wonderful homemade recipes.
The Single Gourmet & Traveller – I think they have more depth of flavour than the white ones, but I know some people would disagree!
Silver Screenings – enjoy.
My Little Italian Kitchen – they do smell delicious, but they bake so quickly that you don’t get the same aromas as you would when baking a loaf.
Narf77 – ooh, very jealous of you having a wood burning stove!
Frugal Feeding – thank you.
Terra – they’re absolutely perfect for lunchtime. Hope you enjoy them as much as we do.
Nuts About Food – definitely. My parents gave me the baking stones for my birthday and they’re brilliant – they make the best pizzas ever!
Amanda – absolutely agree, these are so simple and taste so much better than shop bought.
I’m really thinking about buying How to Bake – primarily due to the breads (which I want to get better on). Would you recommend it?
Love pitta bread! Thanks for sharing with us 🙂
xxxFiC.
I tried school dinners a few times! you didn’t miss out! Pittas are on my to-bake list and yours looks absolutely incredible! you’re one talented baker!
I must admit I make that I make a large amount of flatbreads and naan breads amongst others but don’t think I have made pitta breads. Not sure how they have passed me by. I blame M&S as I am partial to theirs above all others. I love your version using more wholemeal flour so I must get onto baking some soon xx
Lovely idea and I especially like that they freeze well. Homemade pitta whenever I want? Hurrah!
Yum. That looks so good. My grandfather used to use store bought pita bread to turn it into these delicious little seasoned toast bites, and I love the idea of making the actual pita bread at home. 🙂
Also–I never ate a school lunch either (always packed my own)…but that has more to do with the fact that I thought the school lunches were gross.
I was exactly the same as school; although I was known as ‘salad girl’. My party trick was putting two cherry tomatoes in either side of my cheek, waiting until some unsuspecting boy came along, and then slapping my palms against my cheeks simultaneously. Pop! x
Baking Beardy – I’d highly recommend it. For some reason I never really liked Paul Hollywood, but since buying his book I’ve really warmed to him. Possibly because his recipes taste so good!
Katerina – my pleasure.
Jenny – thank you! And yep, I had school dinners at secondary school. They were not good 🙁
Laura – if I did go back to shop bought, M&S would be my choice too – I think they make the fluffiest ones out of all the supermarkets!
Kathryn – I’m not mad keen on freezing bread as I think it loses flavour/texture but these seem to stand up to it pretty well.
Erin – seasoned toast bites sound good 🙂 Have you ever made fattoush? It’s a lovely salad made with pitta chips which sounds a bit like what your grandad made.
The SW Food Blog – haha, let’s hear it for salad-filled lunchboxes! 🙂
i totally relate; i had whole green peppers in my lunch bag! the kids didn’t really come up with a clever way to laugh at me though… they just laughed.
i’m glad you still enjoy your carrots! lovely recipe, too. that herb hummus looks fantastic!
Making bread is therapeutic I think. I love making bread but honestly get scared to venture into uncharted end waters like croissants, pretzels or pita bread. I have wanted to make these and since yours came out so gorgeous I think Im brave enough to try. Like the Little Engine That Could…… “I think I can, I think I can …..”
What a great recipe! I make lunch for Mr NQN every day and for the past few weeks, he has been having wholemeal pita bread. Alas mine is bought but now I have a recipe to make my own! 🙂
Kale – glad to hear I have a kindred vegetable spirit 🙂 I’ll be posting the hummus recipe tomorrow if you’d like to give it a go.
Tara – pitta bread is a lot easier than croissants, promise! Easier than a normal loaf of bread in fact…
Lorraine – what is it with these lucky men getting their lunch made for them? I do the same for Carniverous Fiance (although I think I love doing it as much as he loves me doing it!)
Thanks for this recipe. I always end up buying pitta from my local greek shop but it’s white bread based so it’s really lovely to have a wholemeal version 🙂 x
Pingback: The Best Homemade Hummus (with Lots of Herbs) | thelittleloaf
Like you, homemade pitta was a revelation and like you I don’t know why. Having been brought up on homemade wholemeal bread, I too used wholemeal flour in mine and they were delicious. I haven’t made them a second time though. If I’m going down the hummus route, perhaps I should go the whole hog and make some pitta bread to go with it.
Urvashi – definitely try this version, it’s soft, fluffy and lovely and nutty.
Choclette – you definitely should, homemade hummus and pitta is the best combination ever 🙂
Love making pitta (but I hardly ever do it, for all the stupid reasons that we hardly ever do things that are very easy). Yours looks exceptionally fluffy and delectable.
Can the dough be made in a bread maker?
I’ve not got a bread maker so not completely sure – might be worth checking the instructions on the one you have?
I’m finally catching up on posts, and I see I’ve missed so, so much. But this recipe in particular calls to me. So puffy, so wheaty, and the perfect base for a lot of my favorite foods. Yes, it’s good to be back :).
Would love to give these a go! What is the difference between using a baking stone and a baking tray? My trays are very thin, would I need something thicker to hold the heat?
P.s. Really love reading blog!
Thanks for your lovely comment. A baking stone absorbs moisture where a tray doesn’t so helps produce a lovely light and crusty loaf. However if you heat a baking tray up to a good temperature before baking your loaf you can still get really good results 🙂
Pingback: Wholewheat Pitta | Focus on Flavour
Pingback: Wholemeal Spelt & Coriander Flatbread | thelittleloaf
Thank you for this recipe. I made 16 mini pittas instead of 8 big ones and my 3 girls gobbled them all up in one sitting. They were so tasty and soft, so much better than shop bought. Will definately make again!
Pingback: Wholemeal Pitta Bread – Taylor made bakes